Git cheatsheet (Windows+Tortoise)
Workflow via Windows and TortoiseGit and SMB
TortoiseGit is an Windows Explorer shell extension which you can download to fetch and share changes from the master copy held by ROOL.
The RISC OS sources need to be built on a RISC OS machine. You can use emulator for this, in which case you need to run TortoiseGit in a directory visible to the emulator, but for the rest of this cheatsheet, we assume you will be building on a physical RISC OS machine.
The following examples assumes you are using Windows 7 or later.
On the Windows machine:
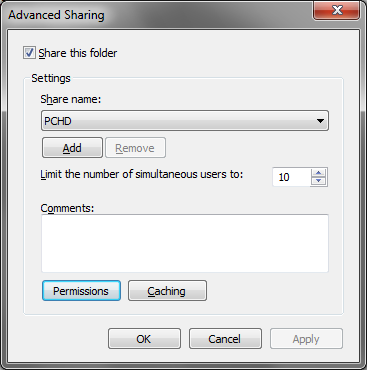
Choose the drive or folder you wish to share, right click on it, choose Properties then the Sharing tab, then Advanced Sharing… button. Tick Share this folder give the share a name, and check the Permissions allow full access for your username at least.
On the RISC OS machine:
- Start OmniClient (installed as !Omni in Apps)
- From the iconbar menu, choose Mounts > Protocols > LanManFS
- Fill in the following fields:
Name: a name by which the mount will be referred to on RISC OS
Server name: the name or IP address of the Windows machine
Directory path: the name you chose for the share
User name: your username
Password: your password
- Click on Connect
- Optionally, from the icon bar menu, choose Mounts > Save mounts, so that the mount settings will be available under the Mounts submenu after any reboots
- There’s more information in the chapter OmniClient in the RISC OS 5 User Guide
Get sources to a single component
On the git machine, navigate to the directory where you want your source tree to be stored.
Next, choosing the Alarm application as an example, clone it:
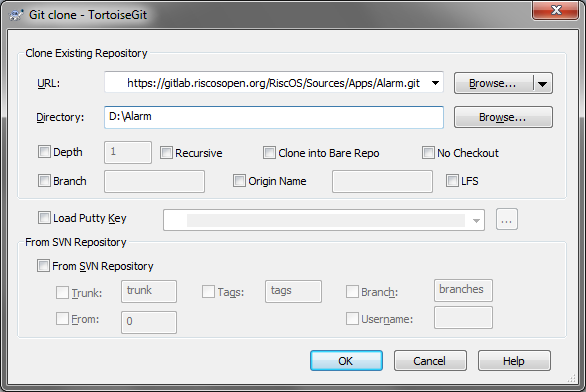
You can find the URL to use from the project’s GitLab page by clicking on the Clone button on the Project > Details screen. If you don’t have an account on the server, you must choose the HTTPS option.
Getting the latest sources to an entire product to build on RISC OS
On the git machine, navigate to the directory where you want your source tree to be stored.
Next, choosing the Risc PC IOMD ROM as an example, clone it:

Then to initialise everything referred to by the product select the Submodule Update… menu entry:

Note that there is a different recommended procedure listed below for fetching the latest version if you have made source code changes locally since you did the clone, or if enough time has passed since you did the clone that someone else might have published changes.
Now, on the RISC OS machine, copy the IOMDHAL.RiscOS directory from your LanManFS mount to a local filing system. The IOMDHAL./git directory (IOMDHAL/.git on the server) is very large and of no use from within RISC OS, so can be ignored. Make sure the Filer has ‘seen’ the SetPaths application inside your copy of the DDE, then run RiscOS.Apps.!Prepare and follow the instructions. You only need to run !Prepare once for each copy of the source tree: subsequently, you should run RiscOS.Apps.!Builder instead.
Getting the source to a particular version of a build
To get a specific previous release, right click on the IOMDHAL folder you just cloned and select the Switch/Checkout menu entry:
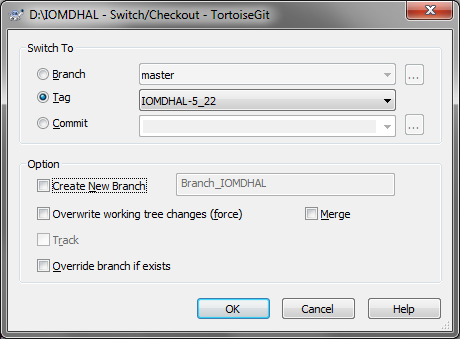
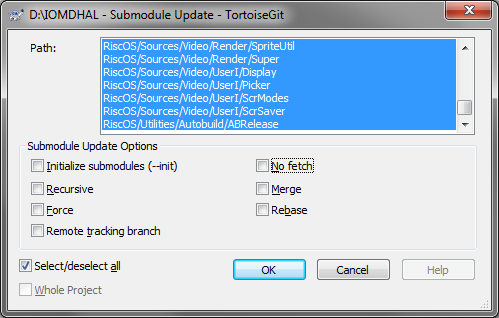
Once the operation completes, click the Update Submodules button, select all the components, then click OK:
Viewing the history of my local source tree
Because git is a distributed version control system, you actually have a complete copy of the repository’s history, including any changes you’ve made locally but not yet shared. It is common to use graphical history viewers on your local machine both for studying the existing code in a faster way than is possible using web viewers, and for checking how your changes will look to others in advance of publishing them.
Tortoise includes a repository browser from where you can read the change logs for a given component, and see what changes were made. Right click on a component (or even at the top level to see the entire product change log) and choose Show log from the menu.

Many other git viewers are available, such as gitg, Fork, Ungit, SmartGit, GitKraken or SourceTree. A handy list can be found on git’s own website. Most IDEs, such as Visual Studio, X-code or Eclipse, come with git viewers built in, so you can do things like view multiple revisions of a file at the same time in different windows without having to explicitly check them out.
Local setup before you start to make changes
Before you can use git to record any changes locally – even if you never intend to share them – you need to configure git with a valid user name and email address. If you have not done this before, open TortoiseGit > Settings and set a user name and contact email:
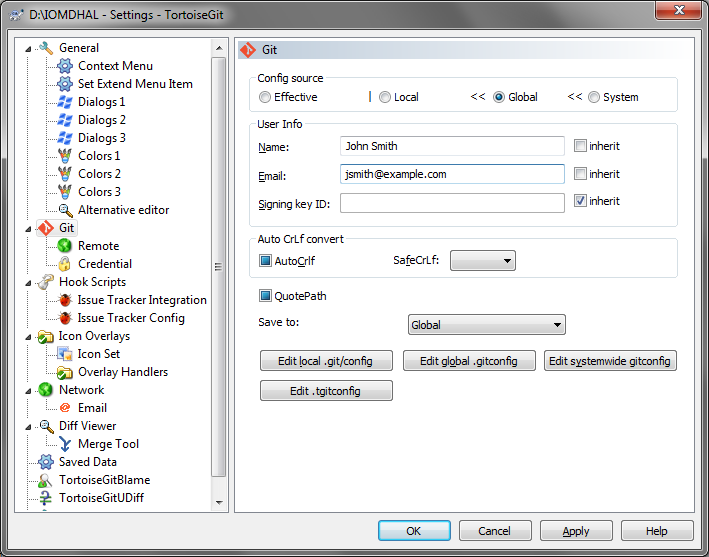
Remember that if you publish your commits, the email address you specify here will be publicly visible. If you prefer, you have the option of using a unique private commit email address instead – any emails sent to that address won’t be delivered, but GitLab will still know that any commits that specify that address should be associated with your GitLab account.
Recording your changes locally
First, you need to copy your source tree from your build machine back to the machine you run git on (unless were building in an emulator on that machine).
You should store the changes you wish to keep on a branch in each of your local git repositories. In many cases, this will make the process of merging your changes with other people’s much simpler. Use the Create Branch… option:

which also switches to the new branch so any future commits are applied there.
The branch name you choose should be descriptive of the line of development that you are performing, and typically would not need to include anything identifying you as a developer by name. We recommend the use of a CamelCase name for the branch because GitLab will automatically convert that to a string of space-separated words to form a default title for your contribution when you come to submit it to ROOL for review. Please do not use ., - or _ characters in your branch names, since these have special meanings for the tag names used in our repositories.
The next step is to commit your changes – that is, tell git which of your changed files you want to be recorded in your commit. This is your chance you check that you aren’t bothering your reviewers with irrelevant changes such as temporary debugging lines. Click on Git Commit submodule → ‘mybranchname’ top level menu
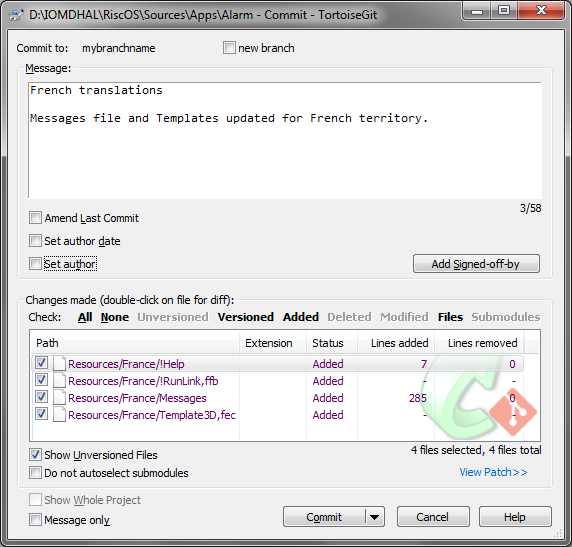
Enter a suitable change log when prompted. This should comprise a (brief) description of the changes on a single line, an empty line, then any further body text and details.
Updating your clone with the latest version
You might want to update your cloned repositories simply to obtain newer versions of the sources. However, it is also necessary to update them immediately before you publish a contribution, because it’s your responsibility to accommodate any changes that other people have made since you started your branch. The process is the same either way.
If you have changed any repositories, first make sure you have committed them before proceeding as described in the section above.
Once this is done, move back to the super-project, and choose Pull… from the menu:
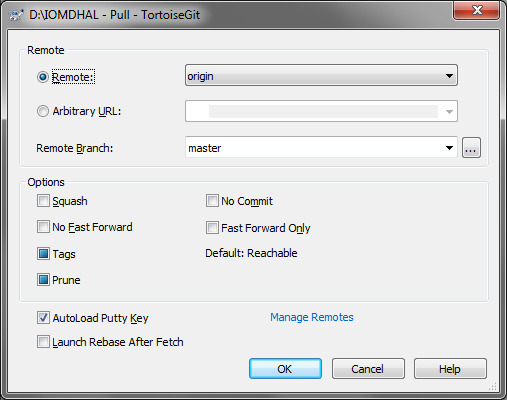
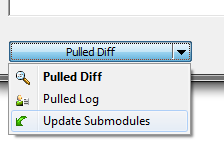
Once complete, choose the Update Submodules from the dropdown
to open the familiar submodule update window. We recommend selecting Init to ensure that if any new submodules have been added centrally you’ll get a copy of that too, but is otherwise harmless.
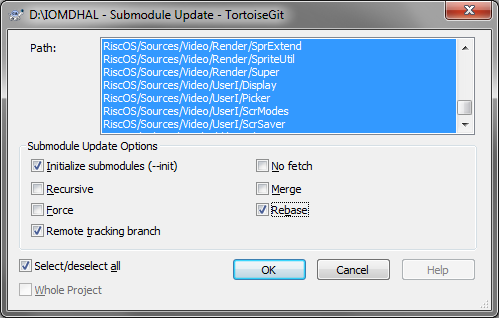
Having Rebase selected will move (“rebase” in git terminology) any commits on your local branch so that they come after the upstream commits in the git history.
Occasionally, git won’t be able to do this rebasing automatically: in such cases it will stop and open the Tortoise rebase dialogue box to help you resolve clashes.
If you have more than one local development branch, note that these operations will only automatically rebase the branch that each component was checked out on. It will be your responsibility to rebase any other branches explicitly.
Lastly, don’t forget to copy the sources back to your build machine at the end, if applicable.
Submit changes for review
Once you are ready to share your changes to a component, you do this by raising a GitLab Merge Request as follows.
First, if you don’t yet have a user account on the GitLab server, you need to request one by emailing code@riscosopen.org. For audit purposes your user account and all merge must use a full (real) name; no nicknames. Once you have an account you will need to go to your account’s Settings then click on SSH Keys and associate an SSH key with your account.
Then, if you have never submitted a merge request to a given component, you will need two things:
- You need to click on Request Access on the Details screen of the top-level RiscOS Group, and
- You need a personal fork of the component on the GitLab server: also on the Project Details screen, click on Fork. After you’ve done this, you can use the Clone button to grab a copy of the URL of the fork repository for use in the next step.
(You may notice that the repositories are listed under your username in a flat namespace. It is for this reason that we now require every component to have a unique name.)
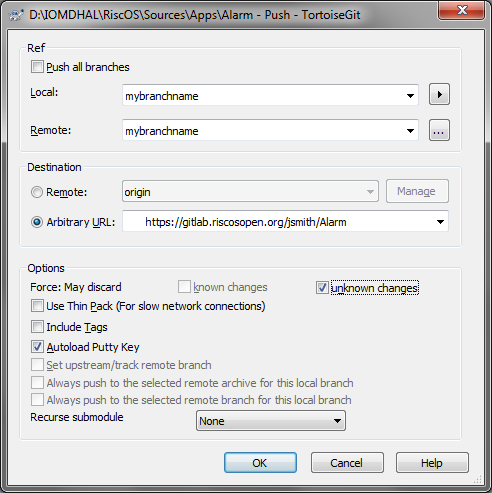
The first time you wish to submit changes from a particular local clone, select the Push… menu entry:

and fill in the remote branch name (usually the same as your local one), paste in the URL from the above step, then click OK.
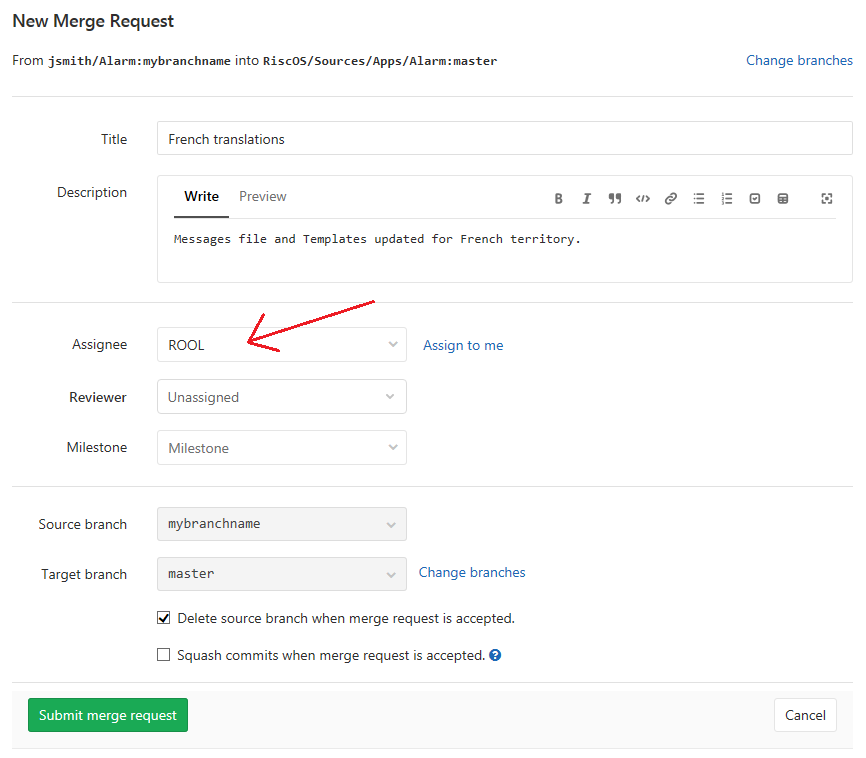
Git will helpfully print the URL you need to go to in order to initiate the merge request. Alternatively, navigate to the Repository Branches screen for your fork project on GitLab, and click on Merge request for the branch in question. On the merge request page:
- Since a merge request can consist of multiple commits, you are asked to enter a description of the merge request as a whole.
- Make sure you select ROOL as the assignee, or nobody will know to look at your merge request! Note that you will not be able to assign the merge request until you have been granted access to the project as explained in step 1 above.
- Don’t assign ROOL as a reviewer, leave that and the milestone unset
Although the GitLab interface allows it, please don’t click the upvote or approve buttons for your own work; they’re for the independent reviewers’ use during your merge request’s journey.
If you are asked to make changes during the review process, and your merge request consists of only a single commit, you would typically make your edits then commit as usual with the Amend Last Commit option ticked:

When you have completed this process, you need to push these again and force (i.e. override) the pre-existing branch in your fork project on the GitLab server:
