Getting Connected Online (Rev #2, changes)
Showing changes from revision #1 to #2:
Added | Removed | Changed
Nearly all models of Raspberry Pi include network hardware to allow you to get online. For this reason the default startup settings of RISC OS Pi have wired Ethernet enabled and automatic address configuration using the Dynamic Host Configuration Protocol (DHCP).
If yours is a Pi 1 model A or A+, Pi Zero, or Pi 3 model A+ which don’t have networking hardware built in you’ll need to press the Escape key during booting to cancel the DHCP request, then disable the network interface as explained below. It is worth considering buying a USB network adapter which would then allow these models to be networked too.
Connecting to an Ethernet Network
Middle-click on the Task Manager iconbar icon (the raspberry) to open the “RISC OS” menu, choose the Configure… menu item, then click on the Network icon, and then the Internet icon to open the “Internet configuration” window.
Ensure that Enable TCP/IP Protocol Suite has a tick next to it so that it’s enabled, and click on the Interfaces icon to set up the network interface. Depending on the model of Raspberry Pi you own, and look for the wired Ethernet interfaces called:
- Broadcom GENET
- Ethernet over USB Add a tick next to whichever of the two is present, and untick all of the other interfaces, such that only one is selected.
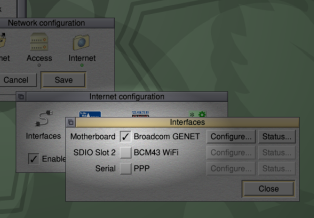
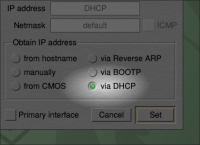
For the one interface which is enabled now, click on the Configure… button and select via DHCP as the method of obtaining an IP address (if your network administrator says another method is being used, you’ll need to consult the more detailed instructions in Chapter 16: Setting up networking in the RISC OS 5 User Guide). Click Set to confirm the choice, then Close the “Interfaces” window.
Now click on the Close button of the “Internet configuration” window, then the Save button. When prompted, select Restart now for the changes to take effect.
Connecting to a WiFi Access Point
Middle-click on the Task Manager iconbar icon (the raspberry) to open the “RISC OS” menu, choose the Configure… menu item, then click on the Network icon, and then the Internet icon to open the “Internet configuration” window.
Ensure that Enable TCP/IP Protocol Suite has a tick next to it so that it’s enabled, and click on the Interfaces icon to set up the network interface. Provided your Raspberry Pi has onboard WiFi you will be able to tick the BCM43 interface (if it’s shaded then this model can’t use wireless networking). Untick all of the other interfaces, such that only one is selected.
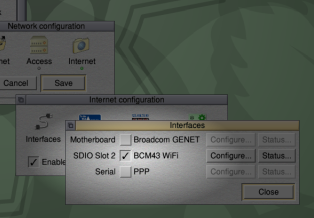
Click on the Configure… button next to the BCM43 interface and select via DHCP as the method of obtaining an IP address (if your network administrator says another method is being used, you’ll need to consult the more detailed instructions in Chapter 16: Setting up networking in the RISC OS 5 User Guide). Click Set to confirm the choice, then Close the “Interfaces” window.

Now click on the Close button of the “Internet configuration” window, then the Save button. When prompted, select Restart now to restart RISC OS with the wireless hardware enabled.
Note: The very first time this happens, the boot process will wait for 30 seconds trying to request an address. Allow that to timeout, because you need to be let into a WiFi access point first.
On the lefthand side of the iconbar there will now be a WiFi Manager icon. Middle-click on the icon and look for the name of the access point you wish to join. Move the mouse pointer across to the right of the access point’s name to the “Connection” window. Enter the password (if there is one) in the box.
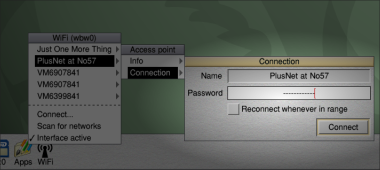
If the access point you have chosen is the one always nearby when the Pi is turned on, tick the Reconnect whenever in range option so that RISC OS will log you back in on power up. In any event, click the Connect button to join the access point. After a short delay the hourglass will finish and you’re now connected! The signal strength is shown by the number of bars on the WiFi Manager’s icon.
Disabling Networking
Middle-click on the Task Manager iconbar icon (the raspberry) to open the “RISC OS” menu, choose the Configure… menu item, then click on the Network icon, and then the Internet icon to open the “Internet configuration” window.
Disable networking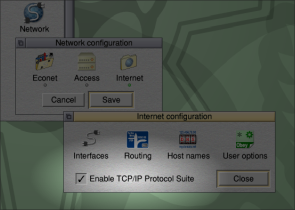
To disable networking, untick the Enable TCP/IP Protocol Suite option, then click on the Close button, then the Save button. When prompted, select Restart now for the changes to take effect.
