Set Up Unix for Omni Client (changes)
Showing changes from revision #0 to #1:
Added | Removed | Changed
OmniNFS, the component used by !OmniClient to connect so NFS shares supports
- NFSv3
- pcnfsd authentication (not essential)
Connecting to FreeBSD
To connect to FreeBSD, version 13.1-RELEASE is used in this example, you need to export the directories of interest and set their permissions up.
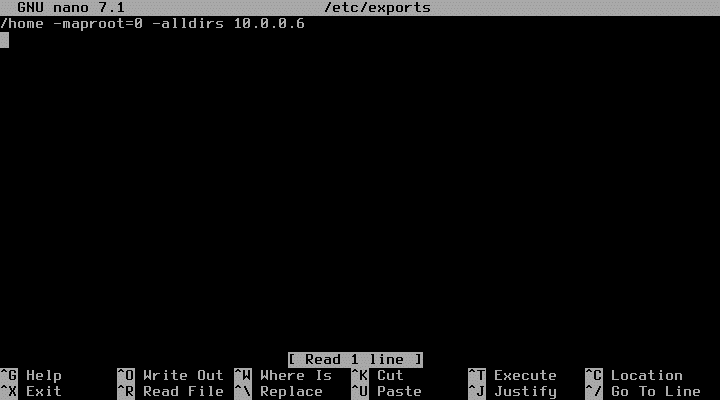
For simplicity these examples don’t require a pcnfsd to be running (which would have been used to authenticate users) and instead rely on restricted access using the IP address of the RISC OS computer. Edit (or create) /etc/exports to add this line, substituting the address of your RISC OS computer in place of 10.0.0.6 shown:

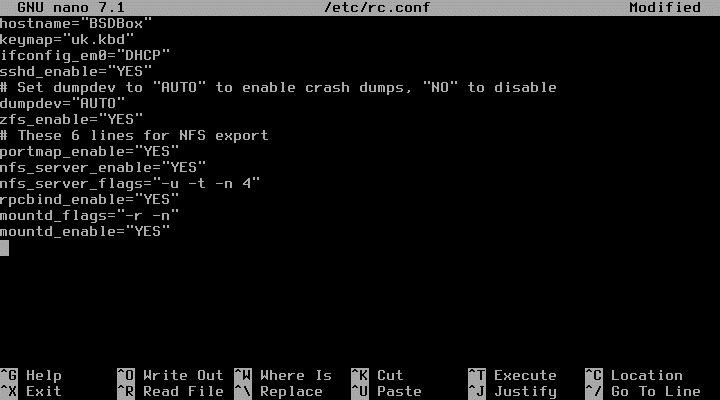
Next, the NFS server needs to be enabled as well as mountd which will read in the /etc/exports just created. Edit /etc/rc.conf to add the 6 lines to do this:

Reboot in order to have the changes take effect.
Adding a home
Although in principle any directory could be exported, the convention is to keep user files below /home on the disc. Be careful that /home must be a real directory, not a symbolic link to somewhere else (some versions of FreeBSD point it to /usr/home) because mountd doesn’t export symbolic links so wouldn’t be accessible remotely.
As the root superuser, create a home directory for a riscos user and set the ownership to UID=32767 and GID=9999; these are the magic user and group id numbers that !OmniClient will send when logging in as ‘nobody’:
mkdir /home/riscos
cd /home
chown 32767 riscos
chgrp 9999 riscos
chmod 755 riscos
Mounting with OmniNFS
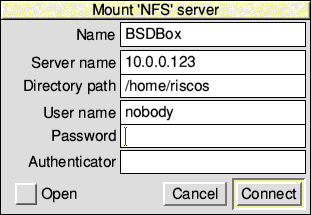
From the !OmniClient icon bar icon go Mounts → Protocols → NFS and complete the server details to log in, substituting the address of your FreeBSD computer in place of 10.0.0.123 shown:

then click Connect. If NFS doesn’t appear in the Protocols menu, it may need enabling – see Selecting OmniClient’s Protocols in chapter 17 of the RISC OS 5 User Guide.
